

Outdoor Lighting Manufacturer
Outdoor Lighting to meet your every need.
Outdoor Lighting come in all shapes, sizes and styles to match the aesthetic of various types of commercial and industries properties. Some fixtures are intended for specific purposes while others can be used in multiple areas across differing industries. Regardless of where they’re utilized, however, all outdoor lighting fixtures must maintain the same high level of quality throughout the environment. Browse our outdoor lighting products list below to get started.
Outdoor LED Lighting
Wandan Lighting specialist offers a wide variety of Outdoor LED Lights to meet your every need.
Outdoor LED lights are lighting fixtures designed to be used outside, such as in gardens, driveways, walkways, patios, and parking lots. They use light-emitting diodes (LEDs) as the light source, which are known for their energy efficiency, durability, and versatility.LED lights produce light by passing an electrical current through a semiconductor material, which emits photons of light. LED lights are more energy-efficient than traditional lighting sources, such as incandescent or fluorescent bulbs, because they consume less energy to produce the same amount of light. They also have a longer lifespan and are more durable, making them ideal for outdoor applications where they are exposed to the elements, such as rain, wind, and temperature fluctuations.
Outdoor LED lights are available in a variety of types, including floodlights, spotlights, pathway lights, wall packs, and area lights, among others. They can be used for a range of outdoor lighting needs, such as security lighting, accent lighting, landscape lighting, and task lighting.Outdoor LED lights are energy-efficient and long-lasting lighting solutions for illuminating outdoor spaces. Here are some features and benefits of outdoor LED lights:
- Energy-efficient: Outdoor LED lights use less energy than traditional lighting sources, such as incandescent bulbs, resulting in cost savings on energy bills.
- Long lifespan: LED lights have a longer lifespan than traditional lighting sources, which means they require less maintenance and fewer bulb replacements over time.
- Brightness: LED lights are available in a range of brightness levels to suit different outdoor lighting needs, from accent lighting to high-intensity flood lighting.
- Durability: Outdoor LED lights are designed to withstand exposure to the elements, such as rain, wind, and temperature fluctuations, and are typically made with weather-resistant materials.
- Versatility: LED lights can be used in a variety of outdoor applications, such as landscape lighting, security lighting, pathway lighting, and flood lighting.
- Color options: LED lights can be designed to produce a range of colors, making them ideal for creating dramatic outdoor lighting effects or highlighting specific outdoor features.
When selecting outdoor LED lights, it is important to consider factors such as the desired brightness level, color temperature, beam angle, and color options, as well as the size and layout of the outdoor space. It is also important to choose high-quality, weather-resistant LED lights that are appropriate for the specific outdoor application. Consulting with a lighting professional can help ensure that the right outdoor LED lights are selected and installed for optimal performance and energy efficiency.
Relate Outdoor LED Light
Wandan Lighting specialist offers a wide variety of Outdoor LED Lights to meet your every need.
-

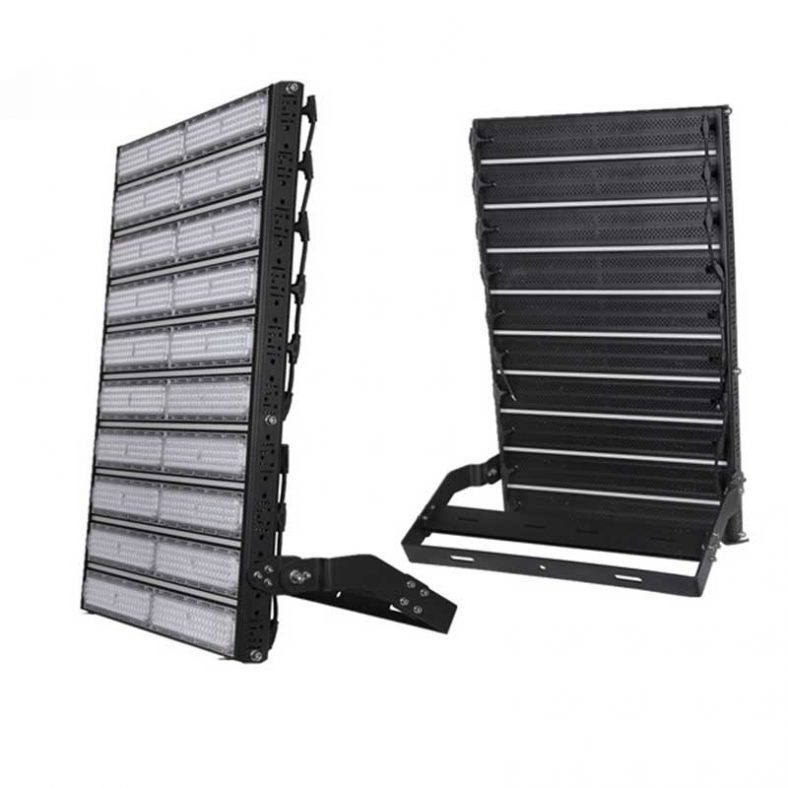
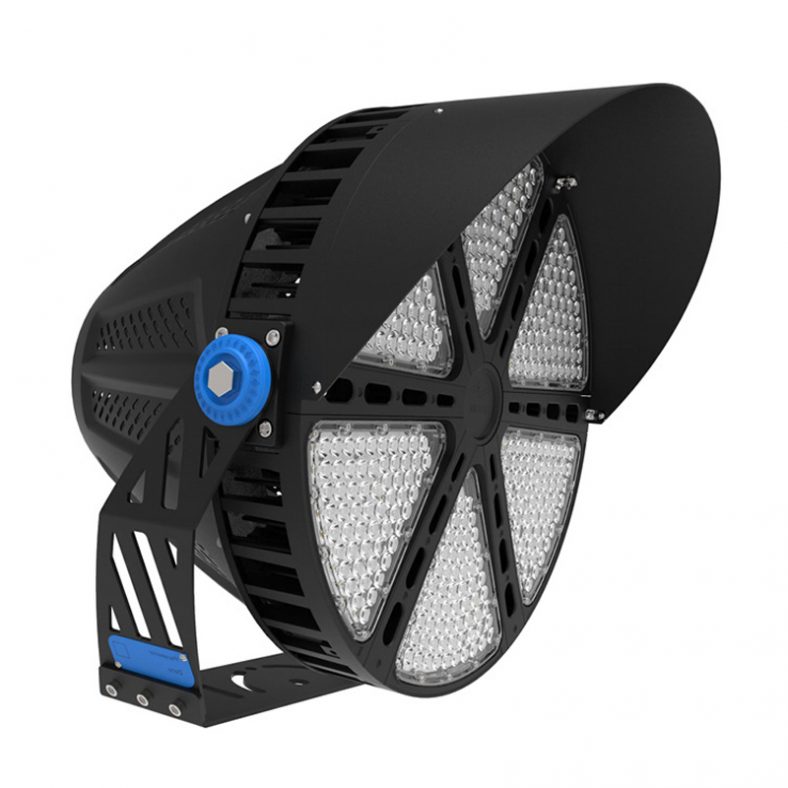
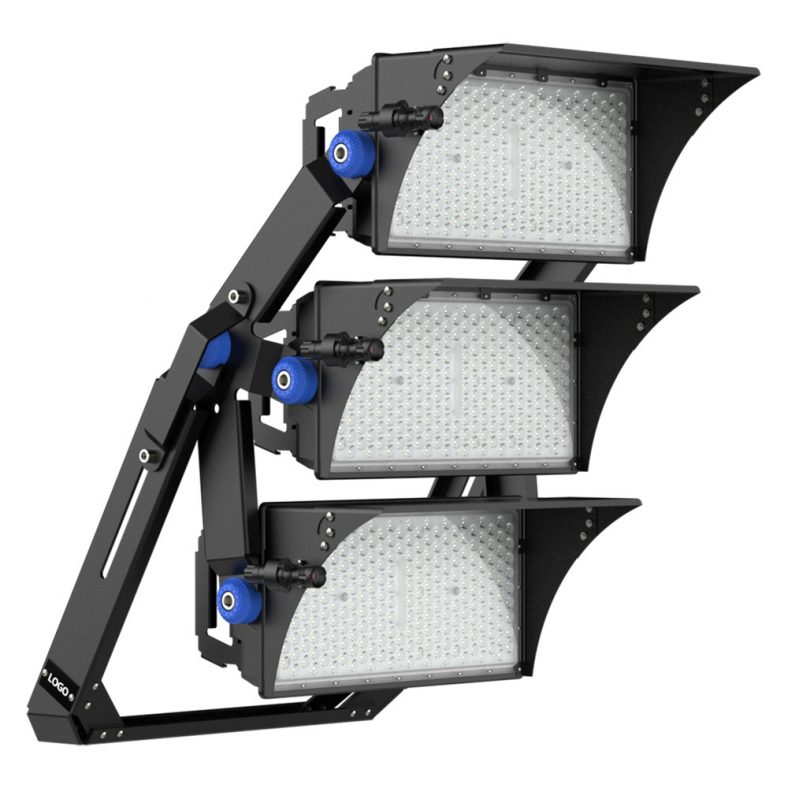
300W To 1000W 140lm~150/w LED Stadium Floodlight
-
150lm/w to 180lm/w LED Stadium Light With Optical Grade PMMA Lens
-
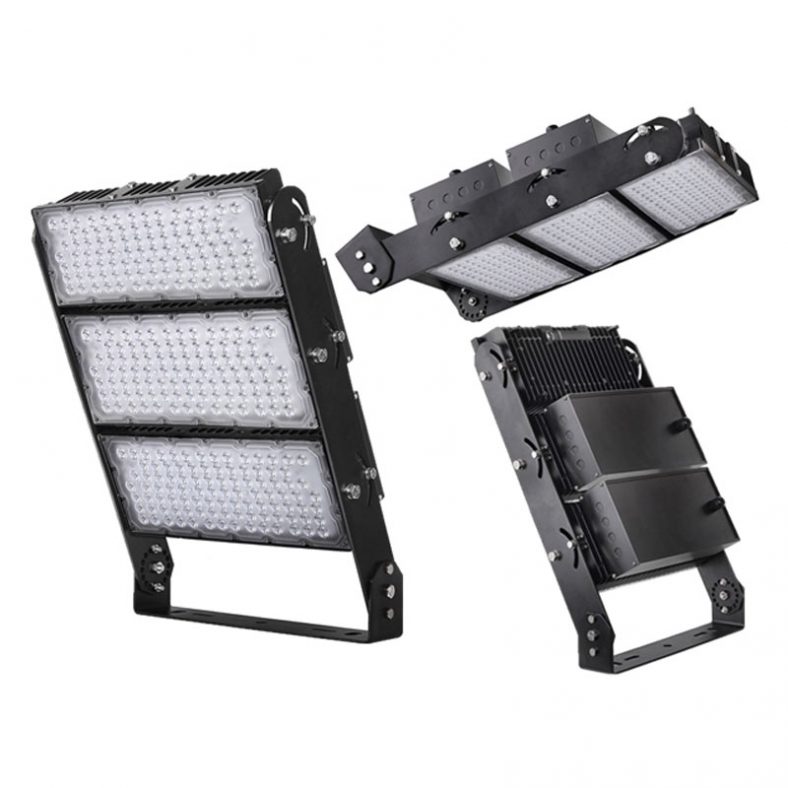
250W Per Modular High Power LED Floodlights For Football Field
-
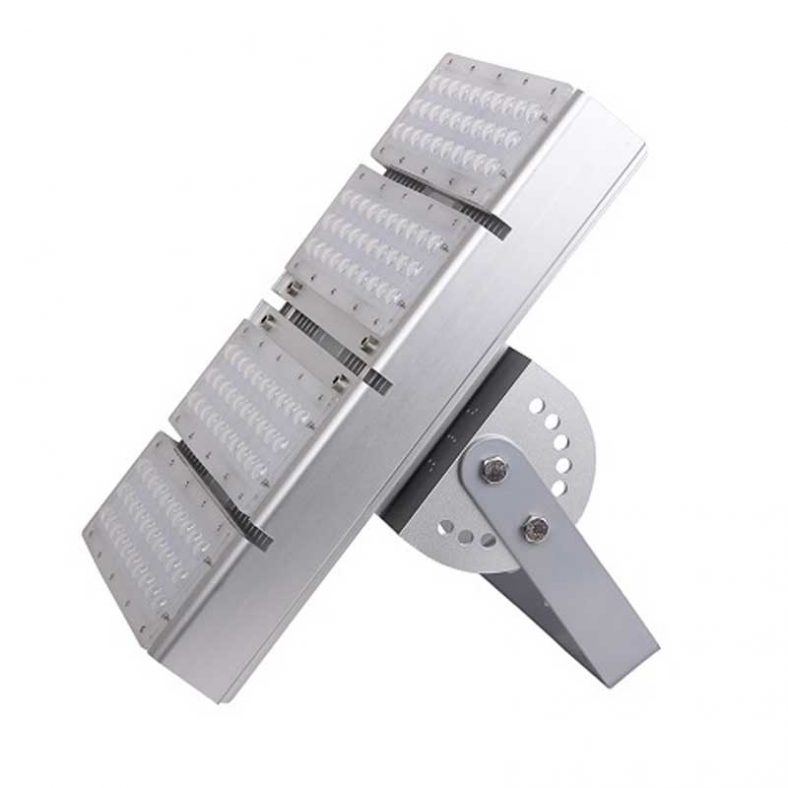
Angle Adjustable 150lm/w To 170lm/w LED Stadium Light
-
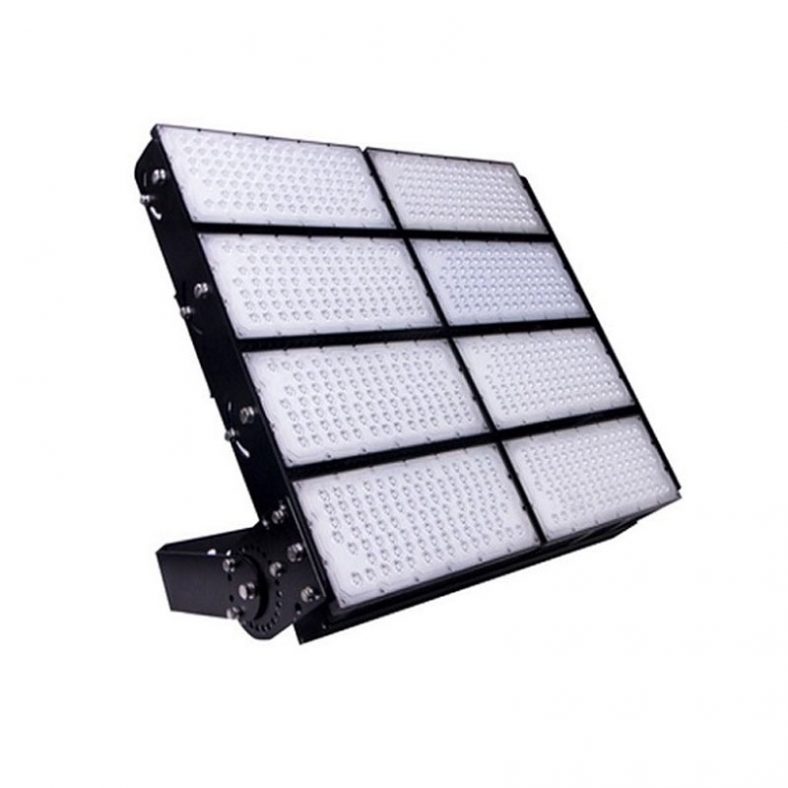
150lm/w to 160lm/w 1500W-2000W Modular Stadium Light
-
Wholesale LED Tower Chandelier With Mingwei Power Supply
-
Super Bright Tower Hanging Stadium Lights
-
High brightness 750W 1200W LED spot light
-
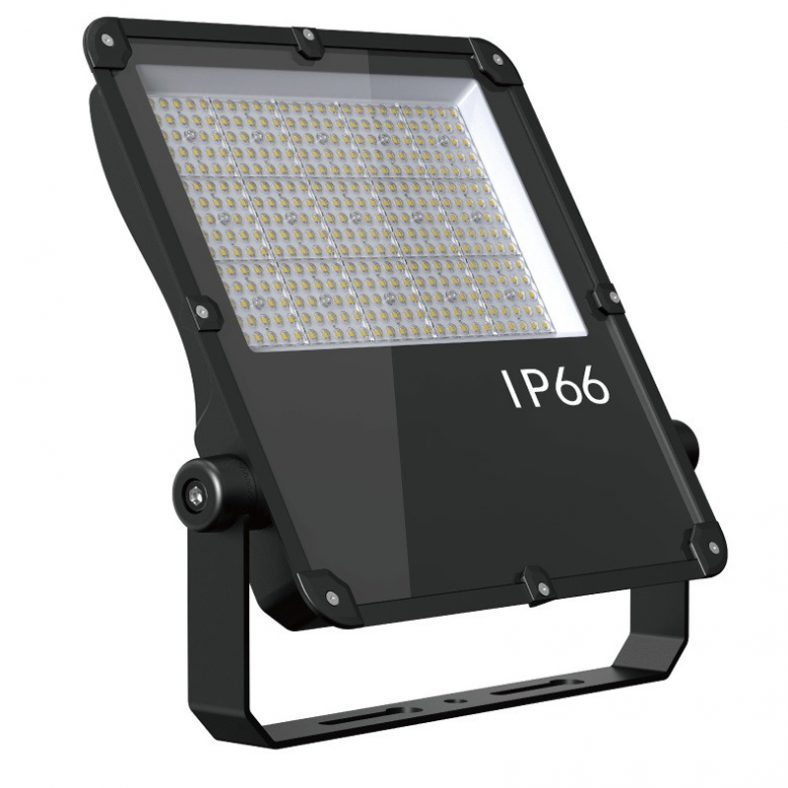
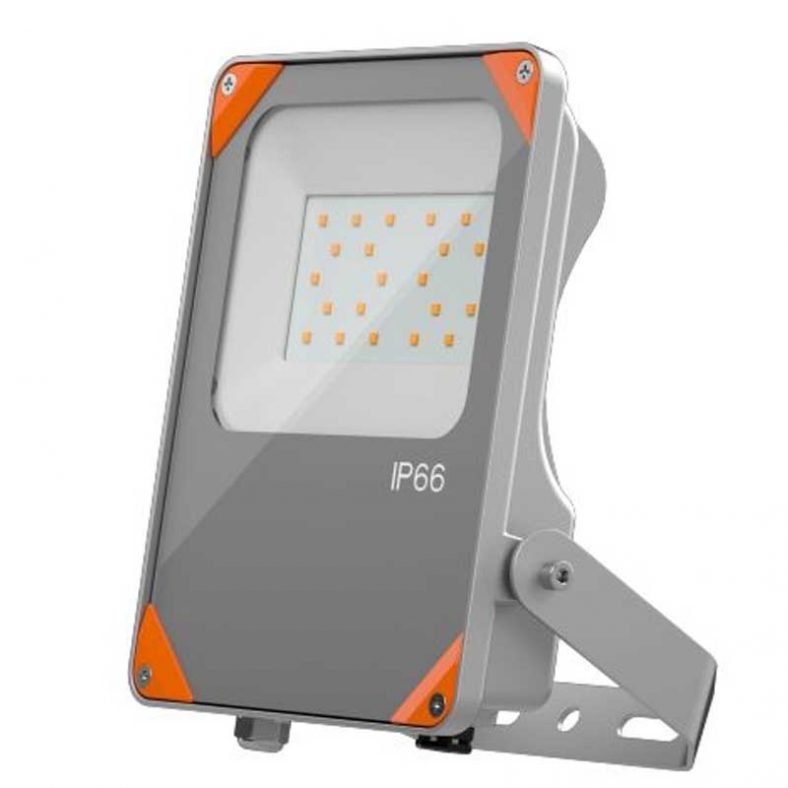
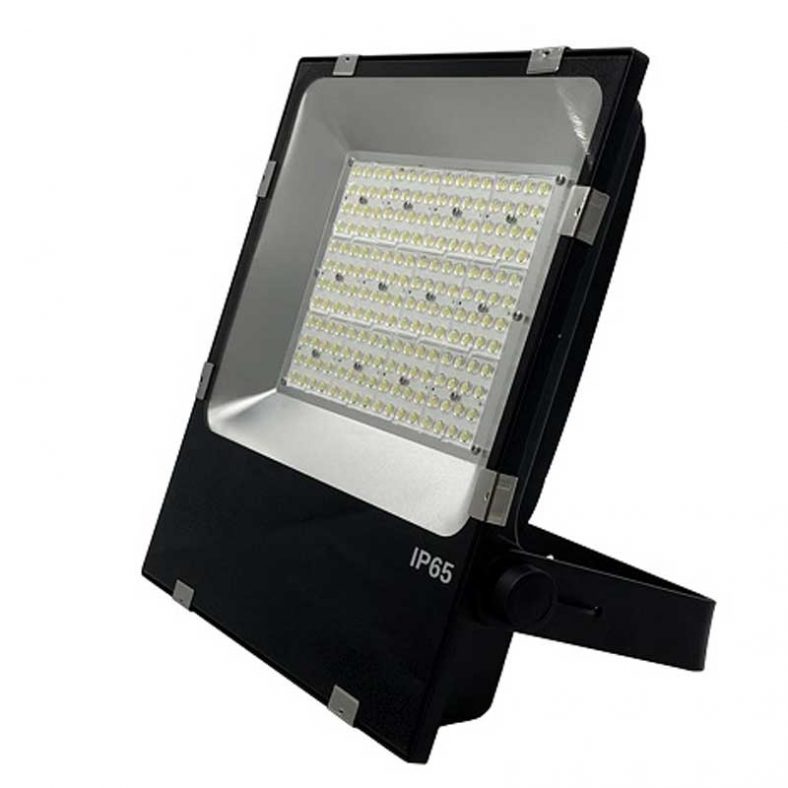
SMD 2835 High Lumen Led Flood light 300W
-
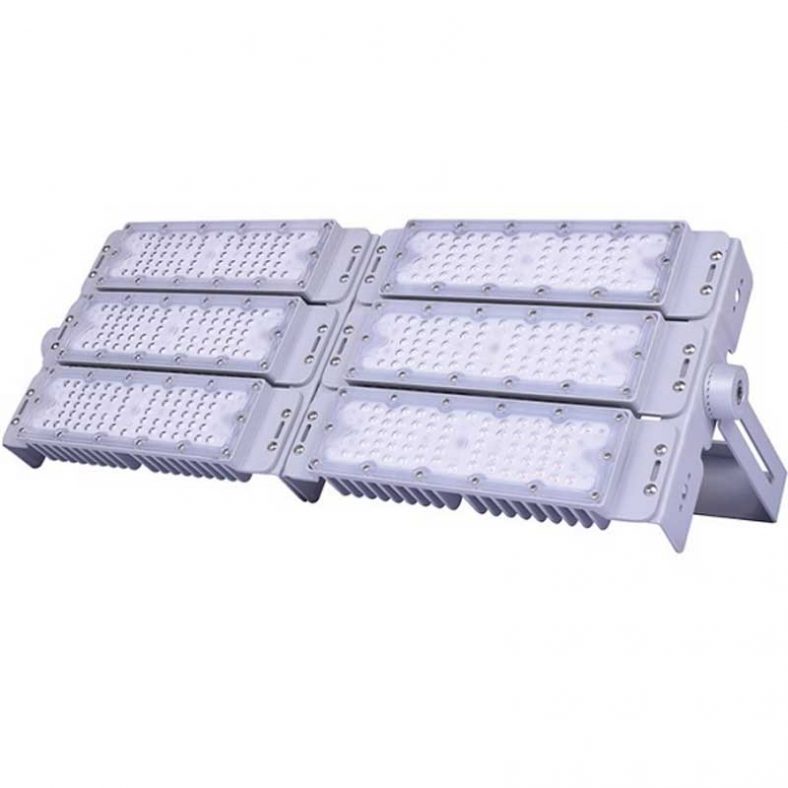
IK08 IP66 500W 1000W 1500W 2000W Modular Led Flood Light
-
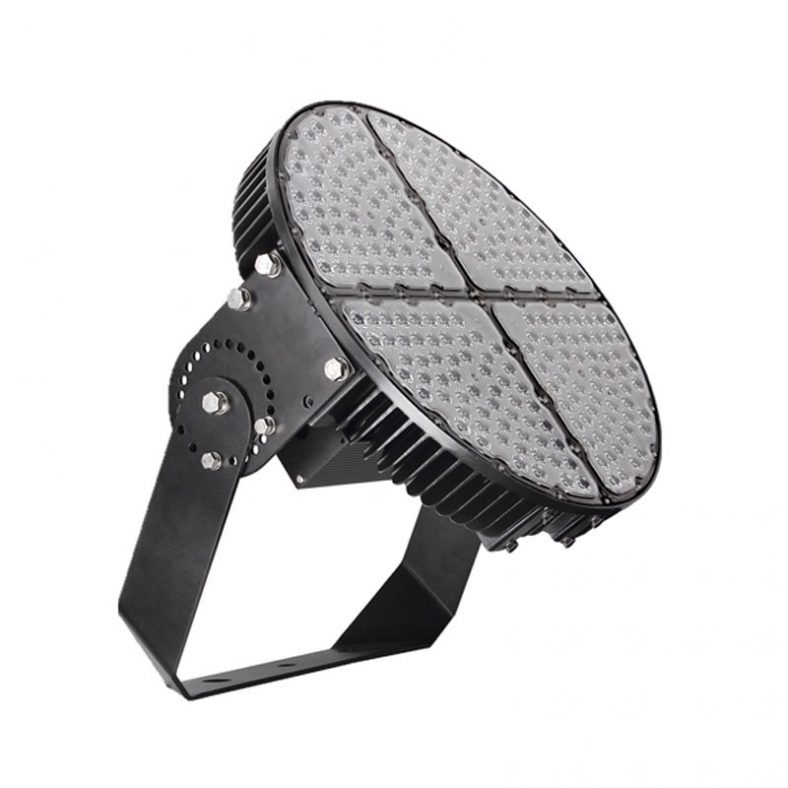
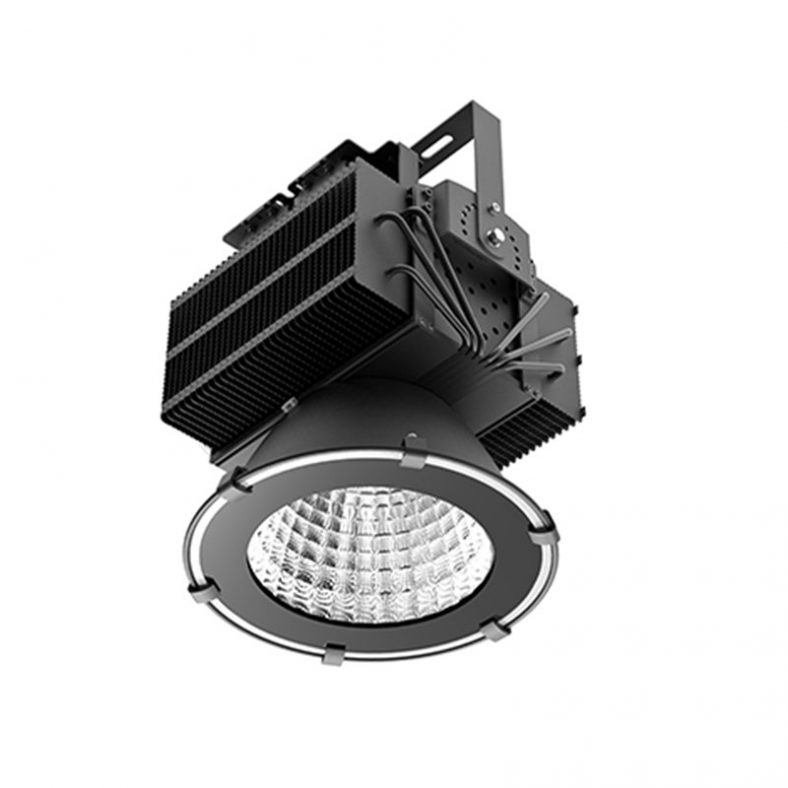
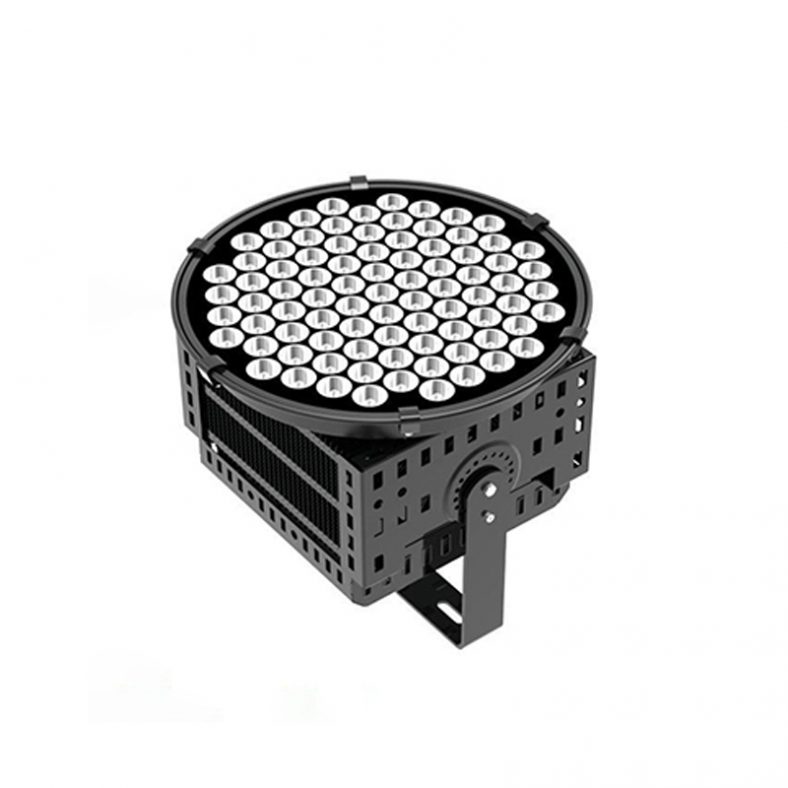
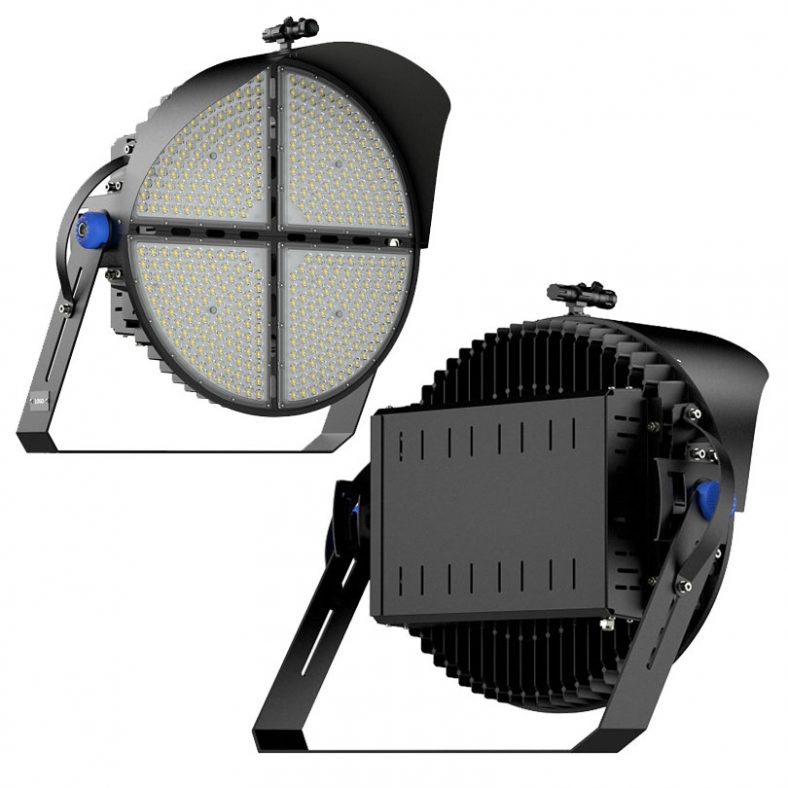
800W 1000W 1200W Round LED stadium lighting fixtures

Outdoor LED Light Kits/Parts
Wandan Lighting specialist offers a wide variety of Outdoor LED Light to meet your every need.
Outdoor LED Light Buy guide
Wandan Lighting specialist offers a wide variety of Outdoor LED Lights to meet your every need.
Installing outdoor lighting can be a great way to add beauty and functionality to your home’s exterior. Here are some steps to follow when installing outdoor lighting:
- Plan your lighting design: Before you start installing your outdoor lighting, you need to plan your lighting design. Think about the areas of your yard or outdoor space you want to illuminate and the type of lighting that will work best for each area. Consider factors like the size of the space, the types of activities you’ll be doing, and any safety concerns.
- Choose your lighting fixtures: Once you have your lighting design in mind, you’ll need to choose your lighting fixtures. There are many different types of outdoor lighting fixtures to choose from, including spotlights, floodlights, pathway lights, and deck lights.
- Gather your tools and materials: You’ll need a few tools and materials to install your outdoor lighting, including a power drill, screws, wire connectors, wire strippers, and electrical tape.
- Install your wiring: If your outdoor lighting requires wiring, you’ll need to install it before you can install your fixtures. Follow the manufacturer’s instructions for wiring your lighting, and make sure to turn off power to the area before you start.
- Install your lighting fixtures: Once your wiring is in place, you can start installing your lighting fixtures. Follow the manufacturer’s instructions for each fixture, and make sure to secure each fixture tightly to prevent it from falling or moving.
- Test your lighting: Once all of your lighting fixtures are installed, it’s important to test them to make sure they’re working properly. Turn on the power and check each fixture to make sure it’s producing the right amount of light.
- Make adjustments: After testing your lighting, you may need to make adjustments to your fixtures to get the lighting just right. Adjust the angle of your fixtures and the brightness of your bulbs as needed to create the perfect outdoor lighting design.
Overall, installing outdoor lighting can be a fun and rewarding project. With a little planning and the right tools, you can create a beautiful and functional outdoor lighting system that will enhance the beauty and safety of your home’s exterior.
Indoor and outdoor lighting have different purposes and requirements due to the unique characteristics of each environment. Here are some key differences between indoor and outdoor lighting:
- Protection from the elements: Outdoor lighting fixtures are designed to withstand exposure to the elements, such as rain, wind, and temperature fluctuations. Indoor lighting fixtures, on the other hand, are not designed to withstand such conditions.
- Illumination level: Outdoor lighting typically requires a higher level of brightness than indoor lighting, as it is often used for safety and security purposes. Indoor lighting, on the other hand, may require less brightness for tasks such as relaxation or ambiance.
- Directional lighting: Outdoor lighting often requires directional lighting to highlight specific features or areas, such as a pathway or a building façade. Indoor lighting may also use directional lighting, but it is often used to highlight specific objects or areas within a room.
- Color temperature: Outdoor lighting typically has a cooler color temperature to enhance visibility and security, while indoor lighting may have a warmer color temperature to create a comfortable and inviting atmosphere.
- Energy efficiency: Indoor lighting typically requires less energy than outdoor lighting due to the lower brightness requirements and less demanding environmental conditions.
Overall, the primary differences between indoor and outdoor lighting are the level of brightness, the directionality of the lighting, and the requirements for protection from the elements. When selecting lighting for a particular environment, it is important to consider the specific needs of the space and the intended use of the lighting.
The number of lumens you need for outdoor lighting will depend on the specific area you want to illuminate and the level of brightness you desire. Here are some general guidelines:
- Pathway lighting: For outdoor lighting along walkways, you’ll typically need between 50 and 100 lumens per square foot. This will provide enough illumination for safe and comfortable navigation.
- Security lighting: For outdoor lighting that’s intended to provide security or deter intruders, you’ll typically need between 700 and 1300 lumens. This will provide a bright, well-lit area that will make it difficult for anyone to approach unnoticed.
- Landscape lighting: For outdoor lighting that’s meant to highlight landscaping or architectural features, you’ll typically need between 100 and 300 lumens per square foot. This will provide a soft, ambient glow that enhances the beauty of the area without being too bright.
- Outdoor entertaining areas: For outdoor lighting in areas where you’ll be entertaining or spending time with friends and family, you’ll typically need between 200 and 400 lumens per square foot. This will provide a warm, inviting atmosphere that’s bright enough to see and socialize in.
Keep in mind that these are just general guidelines, and your specific needs may vary depending on the size and shape of your outdoor space, the location of your lighting fixtures, and your personal preferences. It’s always a good idea to experiment with different lighting levels and adjust as needed to find the perfect balance of brightness and ambiance for your outdoor space.
Replacing an outdoor light fixture is a relatively simple DIY project that can be completed with a few basic tools and some careful attention to safety. Here are the steps to replace an outdoor light fixture:
- Turn off the power: Before you begin working on your outdoor light fixture, turn off the power to the fixture at the circuit breaker or fuse box.
- Remove the old fixture: Unscrew and remove the old light fixture from the wall or ceiling, taking care not to damage any wires or connections.
- Disconnect the wiring: Once the fixture is removed, disconnect the wiring by unscrewing the wire nuts and separating the wires. You may need to cut the wires if they are hardwired into the fixture.
- Prepare the new fixture: Before installing the new fixture, make sure it’s compatible with your electrical system and has the correct mounting hardware. If necessary, assemble any parts that came with the fixture, such as mounting brackets or screws.
- Connect the wiring: Using wire nuts or electrical tape, connect the wires from the new fixture to the wires from your electrical system. Make sure the connections are tight and secure.
- Attach the fixture: Carefully position the new fixture over the mounting bracket or screws and attach it securely using the provided hardware. Double-check that all connections are secure and that the fixture is level.
- Turn the power back on: Once you’re finished installing the new fixture, turn the power back on at the circuit breaker or fuse box and test the new fixture to make sure it’s working properly.
It’s important to always follow proper safety precautions when working with electricity, such as wearing rubber-soled shoes, using insulated tools, and turning off the power before beginning any work. If you’re not comfortable working with electricity or you’re unsure of your ability to complete the project safely, it’s best to hire a licensed electrician to do the job for you.
Installing outdoor wall lighting can be a great way to enhance the aesthetic appeal and security of your home. Here are the steps to install outdoor wall lighting:
- Choose your lighting location: Decide where you want to install your outdoor wall lighting. You should choose a location that’s close to a power source and will provide adequate illumination for your needs.
- Turn off the power: Before you begin working on your outdoor wall lighting, turn off the power to the circuit at the main electrical panel.
- Install an electrical box: Install an outdoor-rated electrical box on the wall where you want to install your light. Make sure the box is securely fastened to the surface and has a weatherproof cover.
- Run the electrical wire: Run the electrical wire from the electrical box to the power source, making sure to leave a little extra wire at the electrical box to make the connections.
- Make the connections: Strip the ends of the electrical wire and connect it to the electrical box and the light fixture using wire connectors. Make sure all connections are tight and secure.
- Attach the mounting bracket: Attach the mounting bracket to the electrical box using the provided screws, making sure it’s level.
- Attach the light fixture: Attach the light fixture to the mounting bracket using the provided hardware, making sure it’s level and secure.
- Test the wiring: Once you’ve wired and installed your outdoor wall lighting, turn the power back on and test the wiring to make sure everything is working properly.
It’s important to always follow proper safety precautions when working with electricity, such as wearing rubber-soled shoes, using insulated tools, and turning off the power before beginning any work. If you’re not comfortable working with electricity or you’re unsure of your ability to complete the project safely, it’s best to hire a licensed electrician to do the job for you.
The number of lumens needed for an outdoor security light depends on the size of the area you want to illuminate and the level of brightness you desire. As a general guideline, outdoor security lights typically range from 700 to 2000 lumens. However, larger areas may require higher lumens to provide adequate illumination.
For example, a small patio or walkway may require a security light with around 700 lumens, while a larger backyard or driveway may require a light with around 1500-2000 lumens. Additionally, if you want to use the security light for surveillance purposes, such as capturing clear images on a security camera, you may need a higher lumen output to provide adequate illumination for the camera.
It’s also important to consider the direction and angle of the light. A wide-angle floodlight may require fewer lumens than a directional spotlight, as it spreads light over a wider area.
Ultimately, the best way to determine the appropriate lumen output for your outdoor security light is to consider the size of the area you want to illuminate, the desired level of brightness, and the specific features of the light fixture you are considering.
Waterproofing outdoor lights is important to ensure they continue to function properly and safely, even in wet or humid conditions. Here are some steps to waterproof outdoor lights:
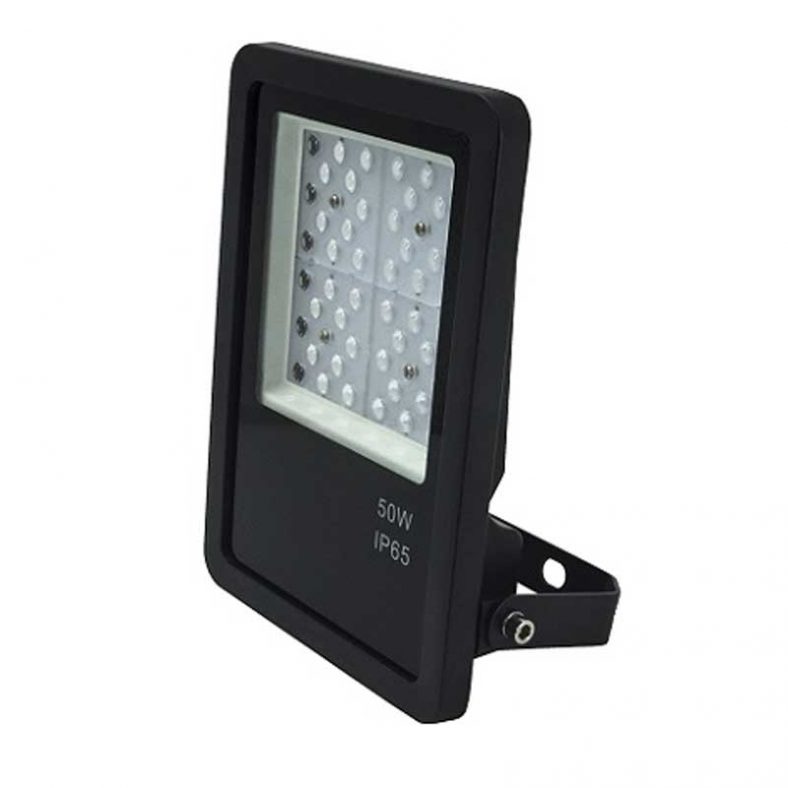
- Choose waterproof light fixtures: The first step to waterproofing outdoor lights is to choose light fixtures that are designed for outdoor use and are rated for wet conditions. Look for fixtures that have an IP rating of at least 65 or higher.
- Seal electrical connections: Seal all electrical connections using a silicone caulk or electrical tape. Make sure that all exposed wiring is covered and protected from moisture. Use outdoor-rated electrical connectors to ensure a secure and watertight connection.
- Use waterproof light bulbs: Use light bulbs that are rated for outdoor use and have a waterproof seal. Make sure that the bulbs are securely screwed into the fixture and that the gasket around the bulb is in good condition.
- Protect the wiring: Protect the wiring by using conduit or wiring channels to shield it from moisture. Make sure that any wiring that is exposed to the elements is secured and protected with waterproof materials.
- Install weatherproof covers: Install weatherproof covers over the light fixtures to protect them from rain, snow, and other outdoor elements. Make sure that the covers are securely fastened and fit tightly over the fixture.
- Check regularly: Regularly check your outdoor lights to ensure that they are still waterproof and functioning properly. Replace any bulbs, covers, or seals that are damaged or worn out.
By following these steps, you can help ensure that your outdoor lights are properly waterproofed and protected from moisture, which will help extend their lifespan and keep them working safely and reliably.
Over time, outdoor light fixtures can become oxidized, which can make them look dirty or discolored. Here are some steps to clean oxidized outdoor light fixtures:
- Turn off the power: Before cleaning any outdoor light fixture, turn off the power to the fixture to prevent electrical shock.
- Remove the light fixture: If possible, remove the light fixture from the mounting bracket so that you can clean it more thoroughly. Follow the manufacturer’s instructions for removing the fixture.
- Clean the fixture: Mix a solution of equal parts vinegar and water in a spray bottle. Spray the solution onto the fixture and let it sit for a few minutes. Then, use a soft-bristled brush or cloth to scrub away the oxidation. For stubborn spots, you may need to use a metal polish or a commercial cleaning product specifically designed for outdoor light fixtures.
- Rinse the fixture: Use a garden hose or a bucket of water to rinse away the cleaning solution and any remaining oxidation. Be sure to rinse the fixture thoroughly, paying special attention to any crevices or hard-to-reach areas.
- Dry the fixture: Use a clean, dry cloth to dry the fixture completely before re-installing it. Be sure that the fixture is completely dry before turning the power back on.
By following these steps, you can help restore your oxidized outdoor light fixtures to their original shine and improve the overall appearance of your outdoor space.
There are a few ways to tell if your outdoor lights are motion-sensored:
- Look for a sensor: The most obvious way to tell if your outdoor lights are motion-sensored is to look for a sensor. Motion sensors are typically located on the bottom or top of the light fixture and may be visible from the ground. They are usually small, rectangular devices that protrude slightly from the fixture.
- Check the product information: If you’re unsure whether your outdoor lights are motion-sensored, you can check the product information that came with the lights. Look for phrases like “motion-activated” or “motion sensor” in the description or specifications.
- Observe the behavior of the lights: If you’re still not sure whether your outdoor lights are motion-sensored, you can observe their behavior. Motion-sensored lights will turn on automatically when they detect motion and turn off after a set period of time. If your lights turn on when you walk by and then turn off after a few minutes, they are likely motion-sensored.
- Consult a professional: If you’re still unsure whether your outdoor lights are motion-sensored or you’re having trouble with the sensor, you may want to consult a professional electrician or the manufacturer of the lights for assistance. They can help you determine whether the lights are motion-sensored and troubleshoot any issues you may be having.
Setting a timer for outdoor lights is a great way to save energy and ensure that your lights turn on and off automatically, even when you’re not home. Here’s how to set a timer for your outdoor lights:
- Choose a timer: There are several types of timers available for outdoor lights, including mechanical timers and digital timers. Choose a timer that suits your needs and preferences.
- Plug the timer in: Once you have your timer, plug it into an outdoor electrical outlet. Make sure the outlet is rated for outdoor use and has a weatherproof cover.
- Set the current time: Use the buttons or dials on the timer to set the current time. Make sure to set the time accurately, as this will determine when your lights turn on and off.
- Set the on and off times: Determine when you want your lights to turn on and off each day. Use the buttons or dials on the timer to set the on and off times. Some timers allow you to set multiple on and off times for different days of the week.
- Test the timer: Once you’ve set the timer, test it to make sure it’s working properly. Plug your outdoor lights into the timer and wait for the scheduled on and off times to see if the lights turn on and off as expected.
- Adjust as needed: If your lights aren’t turning on or off at the right times, or if you need to make changes to the timer settings, you can adjust the timer as needed.
Overall, setting a timer for your outdoor lights is a simple and effective way to save energy and ensure that your lights turn on and off automatically. With a little bit of setup, you can enjoy the benefits of automatic outdoor lighting without any extra effort on your part.
Changing an outdoor light fixture is a relatively simple DIY project that can be completed with a few basic tools and some careful attention to safety. Here are the steps to change an outdoor light fixture:
- Turn off the power: Before you begin working on your outdoor light fixture, turn off the power to the fixture at the circuit breaker or fuse box.
- Remove the old fixture: Unscrew and remove the old light fixture from the wall or ceiling, taking care not to damage any wires or connections.
- Disconnect the wiring: Once the fixture is removed, disconnect the wiring by unscrewing the wire nuts and separating the wires. You may need to cut the wires if they are hardwired into the fixture.
- Prepare the new fixture: Before installing the new fixture, make sure it’s compatible with your electrical system and has the correct mounting hardware. If necessary, assemble any parts that came with the fixture, such as mounting brackets or screws.
- Connect the wiring: Using wire nuts or electrical tape, connect the wires from the new fixture to the wires from your electrical system. Make sure the connections are tight and secure.
- Attach the fixture: Carefully position the new fixture over the mounting bracket or screws and attach it securely using the provided hardware. Double-check that all connections are secure and that the fixture is level.
- Turn the power back on: Once you’re finished installing the new fixture, turn the power back on at the circuit breaker or fuse box and test the new fixture to make sure it’s working properly.
It’s important to always follow proper safety precautions when working with electricity, such as wearing rubber-soled shoes, using insulated tools, and turning off the power before beginning any work. If you’re not comfortable working with electricity or you’re unsure of your ability to complete the project safely, it’s best to hire a licensed electrician to do the job for you.
Wiring outdoor lights requires some basic knowledge of electrical wiring and a few tools. Here are the steps to wire outdoor lights:
- Plan your wiring: Before you begin wiring your outdoor lights, plan the wiring layout and determine the number of fixtures you’ll be installing. Make sure your wiring plan follows all local electrical codes and regulations.
- Gather your tools and materials: You’ll need a few basic tools and materials to wire outdoor lights, including electrical wire, wire connectors, a screwdriver, a wire stripper, and a ladder.
- Turn off the power: Before you begin working on your outdoor lights, turn off the power to the circuit at the main electrical panel.
- Install the electrical box: Install an outdoor-rated electrical box where you want to install your lights. Make sure the box is securely fastened to the surface and has a weatherproof cover.
- Run the wiring: Run the electrical wire from the electrical box to each of the light fixtures, making sure to leave a little extra wire at each fixture to make the connections.
- Connect the wires: Strip the ends of the wires at each fixture and connect them using wire connectors. Make sure all connections are tight and secure.
- Mount the light fixtures: Attach the light fixtures to their mounting brackets or screws, making sure they’re securely fastened and level.
- Test the wiring: Once you’ve wired and installed all of your outdoor lights, turn the power back on and test the wiring to make sure everything is working properly.
It’s important to always follow proper safety precautions when working with electricity, such as wearing rubber-soled shoes, using insulated tools, and turning off the power before beginning any work. If you’re not comfortable working with electricity or you’re unsure of your ability to complete the project safely, it’s best to hire a licensed electrician to do the job for you.
Installing an outdoor light fixture box is an important step in adding an outdoor light fixture to your home. Here are the steps to install an outdoor light fixture box:
- Choose your location: Choose the location where you want to install your outdoor light fixture. Make sure the location is close to a power source and provides adequate illumination for your needs.
- Turn off the power: Before you begin working on your outdoor light fixture box, turn off the power to the circuit at the main electrical panel.
- Choose a box: Choose an outdoor-rated light fixture box that is appropriate for your electrical system and the size of your light fixture.
- Mark the location: Use a pencil to mark the location where you want to install the box. Make sure the box is level and centered.
- Cut the hole: Use a hole saw or jigsaw to cut a hole in the wall or ceiling where you marked the location for the box. Make sure the hole is slightly smaller than the box to provide a tight fit.
- Insert the box: Insert the box into the hole and secure it to the wall or ceiling using the provided screws or mounting brackets. Make sure the box is flush with the surface and tightly secured.
- Connect the wiring: Run the electrical wire through the knockout holes in the box and connect it to the electrical system using wire nuts or electrical tape. Make sure all connections are tight and secure.
- Install the cover plate: Install the weatherproof cover plate over the box to protect the wiring and ensure that the box is waterproof.
- Test the wiring: Once you’ve installed the outdoor light fixture box, turn the power back on and test the wiring to make sure everything is working properly.
It’s important to always follow proper safety precautions when working with electricity, such as wearing rubber-soled shoes, using insulated tools, and turning off the power before beginning any work. If you’re not comfortable working with electricity or you’re unsure of your ability to complete the project safely, it’s best to hire a licensed electrician to do the job for you.
Removing glass from an outdoor light fixture is a simple process that can be done by following these steps:
- Turn off the power: Before you begin working on your outdoor light fixture, turn off the power to the circuit at the main electrical panel.
- Remove the screws: Use a screwdriver to remove any screws that are holding the glass in place. Depending on the fixture, there may be one or more screws holding the glass in place.
- Gently remove the glass: Once the screws are removed, gently pull or twist the glass to release it from the fixture. If the glass is stuck or difficult to remove, try gently tapping it with a rubber mallet or twisting it back and forth until it loosens.
- Clean the glass: Once the glass is removed, clean it with a gentle glass cleaner and a soft cloth. Be careful not to scratch or damage the glass.
- Reinstall the glass: Once the glass is cleaned, carefully place it back into the fixture and secure it with the screws. Make sure the glass is securely in place and there are no gaps or wobbling.
- Turn on the power: Once you’ve reinstalled the glass and secured it in place, turn the power back on and test the light fixture to make sure it’s working properly.
It’s important to always follow proper safety precautions when working with electricity, such as wearing rubber-soled shoes, using insulated tools, and turning off the power before beginning any work. If you’re not comfortable working with electricity or you’re unsure of your ability to complete the project safely, it’s best to hire a licensed electrician to do the job for you.
It is not recommended to use outdoor lights inside, as they are designed for different environments and may pose safety hazards if used improperly.
Outdoor lights are designed to withstand harsh weather conditions, such as rain, snow, and extreme temperatures. They are typically constructed with materials that are more durable and weather-resistant than indoor lights, such as heavy-duty metals and waterproof seals.
Using outdoor lights indoors may not only create an unattractive appearance, but it may also be a safety hazard. Outdoor lights may not be rated for indoor use and may not be designed to meet indoor safety standards. For example, outdoor lights may not be properly grounded or may not be rated for the voltage used indoors, which could pose a fire risk.
In addition, outdoor lights may produce more heat than indoor lights, which could cause damage to indoor materials or create a fire hazard if used improperly.
Therefore, it is recommended to use indoor lights for indoor applications, and outdoor lights for outdoor applications. If you are unsure which type of light to use for a particular application, consult the manufacturer’s instructions or consult with a licensed electrician.
The height at which to mount an outdoor light depends on several factors, such as the purpose of the light, the size of the area to be illuminated, and the height of the mounting surface. Here are some general guidelines for mounting heights:
- Entryways and Doorways: For entryways and doorways, outdoor lights are typically mounted at a height of 6 to 8 feet. This height allows the light to illuminate the area directly in front of the door or entryway, while also providing ample coverage for those entering and exiting the space.
- Walkways and Driveways: For walkways and driveways, outdoor lights should be mounted at a height of 8 to 10 feet. This height allows the light to cover a larger area and illuminate the ground more effectively.
- Security Lighting: For security lighting, outdoor lights should be mounted higher, typically at a height of 10 to 15 feet. This height allows the light to cover a wider area and provides a better vantage point for surveillance.
- Landscape Lighting: For landscape lighting, the height at which to mount outdoor lights depends on the type of lighting and the desired effect. For example, spotlights and floodlights are typically mounted higher, while path lights and accent lights are mounted lower.
In general, the height at which to mount an outdoor light should provide adequate illumination while also complementing the architecture and design of the building or landscape.
